Showing posts with label configuration. Show all posts

Sunday, September 14, 2014

Web fonts

You mightn't know there’s a colourful spectrum of web fonts available for free and supported by Google. Pick them for your  blog, website, Google Docs texts or even for keeping them in your laptop for other uses.


SD Fresh Font byThere’s not much to say about this splendid project. You can check the website at https://www.google.com/fonts and roam about. Teaching this method to your students will empower them to give a personal touch to their blogs, sites and documents.
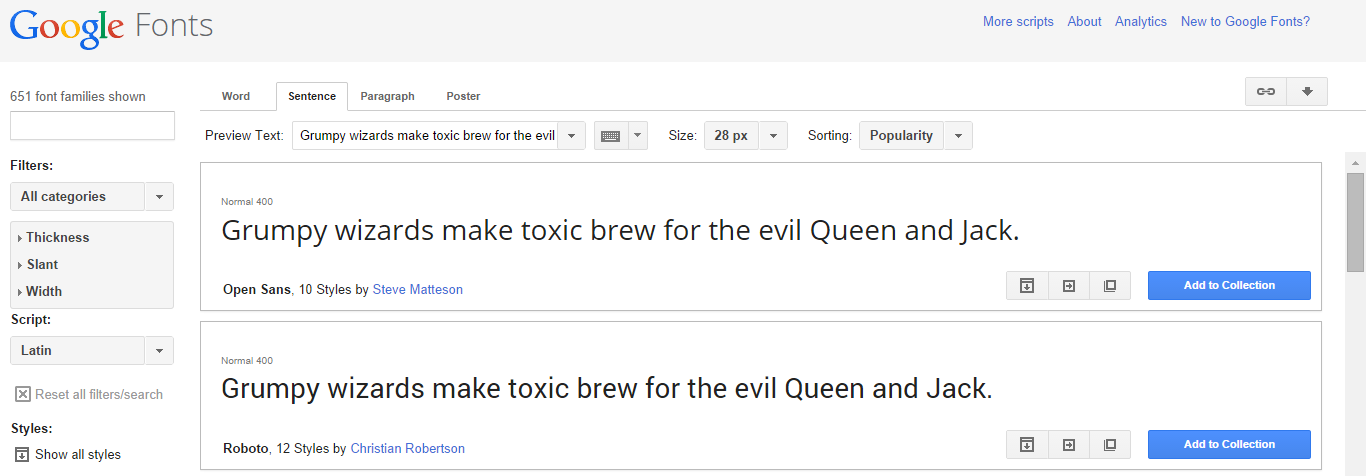


The site gives you the option to review any font, bookmark and obtain the correspondent HTML code to be inserted inside your pages. You can also get a speed impact measure, so you can know the loading time associated with them.

To use it in your blog just insert two lines of code provided by the page after selecting the font: the HTML code and the CSS one.
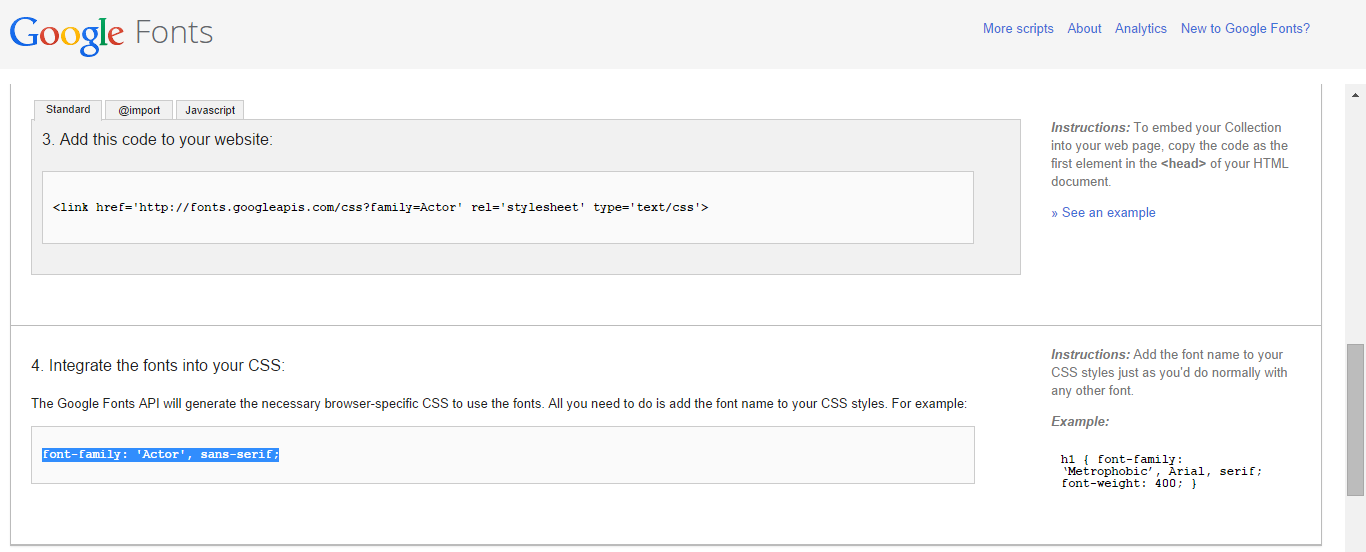


For the HTML code: click on edit and insert your code before the HEAD tag.
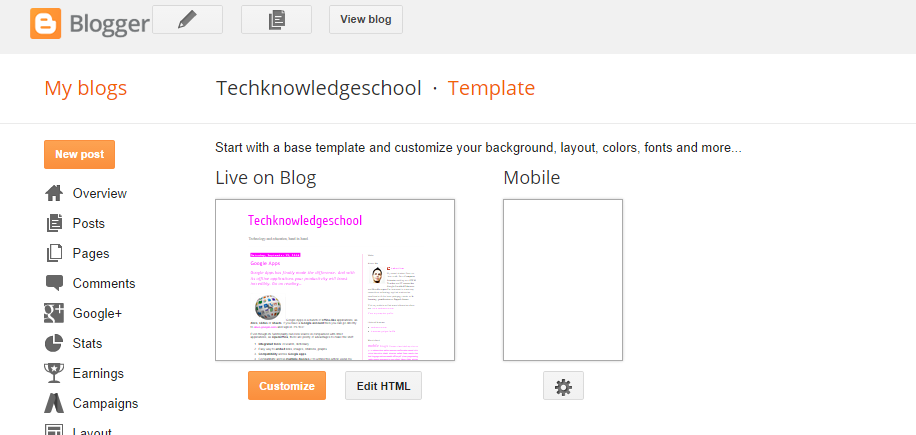


For the CSS code: go to Template/advanced/add css and paste it.
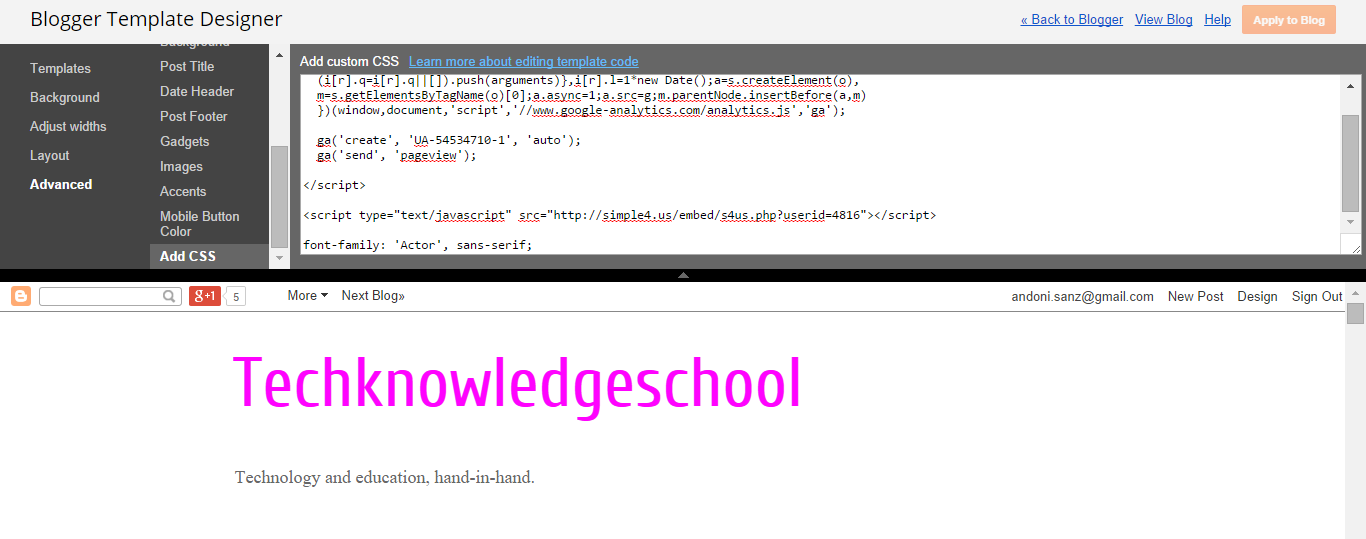

How to use them? I usually write my posts on Google Docs, so I do all the formating there (fonts, bullets, pictures, colors…) and then copy&paste it into Blogger.

Obviously the chosen fonts have to be inserted in both places (Docs and Bloggers). If not it could happen that you see them but others don’t.

Thursday, November 28, 2013

How to set up a cloud printer

Cloud Printers ease people's lives as you can print from any devices connected to the Internet in an easy and clean manner.


Setting up a Cloud Printer is a really easy thing if you know how to do it! To set things up we need a printer connected to a computer (let's call it PR), and another computer from where to print (CL). Both have to be connected to the Internet.


1. In PR install Google Chrome: https://www.google.com/intl/en/chrome/browser/


2. Then, open Chrome and set up a Google account for PR (you can call it myprinterserver@gmail.com, or the like).


4. Go to settings, and type in the search box “print”. The option will appear immediately. Chrome will search for all the devices, your printer included. Select what interests you most (you can also add mobile devices, Google Drive...).


5. Now, in PR navigate to: https://www.google.com/cloudprint. You should see the previously installed printer. Click on the printer and push the sharing button. In the new window add your regular gmail account (the one you'll be using in CL).


From that moment on, everything’s set up in your “server”. Both the computer and the printer should be switched on in order to be able to print. It’s not necessary for Chrome to be opened all the time.


6. In your regular laptop do the same as in #1, #2 and #3.

7. Open your Gmail and you should see a post inviting you to accept the printer. Open it and click on accept. Once you have done that you should see it on your Chrome’s settings (point #4).


8. Install the Windows plug-in, so you can print from any program (https://tools.google.com/dlpage/cloudprintdriver).


Let’s try it!

9. Open Chrome and navigate to some site. Click on print. Google Cloud Print should appear.


10. Do the same with another Windows application. Click on print.


To clear things a little more check this video: