Among educational buzzwords this is for sure the one with the highest pitches nowadays. The flooding of classrooms with new technologies has led to new approaches to classic lectures and traditional educational strategies, and Flipped Classes can be a good one if applied with common sense.

The elements involved have to be well-known to better appreciate the scope of this emerging philosophy:
- Actors: teachers, students and parents. Each one of them will see things differently, and knowing how to make them buy your new proposition will be the key to your success.
- Processes: lesson preparation, outside of classroom time, inside of classroom time, evaluation.
WHAT
It’s an alternative to the traditional teacher/lecture centered approach. In a flipped strategy classroom contents are multimedia based and are accessed through some LMS outside of school. Classroom time is used to deepen that home-acquired knowledge using other strategies, as project based learning, collaborative tasks, etc.
For teachers it is a great way to improve lessons’ structure. Resources can be mapped from the syllabus and new activities can be implemented for classroom time. For students it can be challenging, after all you are taking them out of their classical school environment. But they are also given the opportunity to be in charge of their own education, and they can even set their own pace in the process. For parents it’s an excellent opportunity to take part and track their children’s education.
WHY
Our world is changing. New technologies are gaining power, societies are readapting their habits and schools should improve in the same manner. Our students, who are used to manipulate complex devices like mobile phones, are getting more and more bored in front of paper books and crave for multimedia based, dynamic, colourful, and interactive contents.
A teacher can find a great ally in flipping to engage his students, apply new techniques and create a personal reusable repository of well-selected contents. But not only teachers, students can also take advantage of being empowered and trusted. For them it could be seen like being abandoned in the middle of the dessert, but let’s not forget that constructivism also deals with uncertainty, and that’s a relevant factor for learning reinforcement.
WHEN
There are two whens. The first one is related to preparation. The more quality contents you want, the more time you will have to expend curating them. Anyway it’s important not to be over exigent about them and check their effectiveness (some polls can be done to know the opinion of your students). Your repository should be something flexible and dynamic. If it’s not, then it mightn't work.
The second when is about the time students invest at home, i.e, when should students work after school? That's a tricky question as you lose control of them after they have got out of school. Each student will have a different agenda: sports, music, etc. Then this factor shouldn't preoccupy us excessively, but keeping a record of your students’ complains about not having enough time could be of help for strategy improvement. If out of school time is scarce, flipping could be approached differently.
WHERE
For teachers, where can quality materials be found? My own strategy was to curate a good PLE with plenty of resources classified in: presentations, social networking, documentaries and videos, research, production, publication, citation, collaboration, storage, project management, coding, and augmented reality and virtual worlds. Have a look at one of my boards at Symbaloo which I use in my lessons to teach PLEs to my 13 year-old pupils. What you shouldn't do is just scan your notes, save to a PDF and publish it. There wouldn't be any engagement.
For students the where refers to what place to check lesson’s contents. Forget computers and focus on mobile devices. In fact those are the ones accompanying teenagers everywhere. It's more likely to find a student laying on the sofa, sitting on a bench in the park, or waiting in a mall's entrance for his friends with a mobile on his palm than seeing him sitting down in front of a computer at home. Make it flexible and affordable for them.
HOW
And finally the how-to’s. For teachers it is about how to set up an effective LMS, look for engaging resources, do engage students, and make the rest of the parts involved participate constructively.
LMSs include Moodle (my favourite one and free of charge), Google Apps for Education, TalentLMS or Edmodo among many others. You can bet for one option or weave a combination of them, being the second option more preferable. Moodle is great to track your students' activity, workshops (students grading other students), do exams and to gamify your lessons, while Google rules with documents and real-time collaboration.
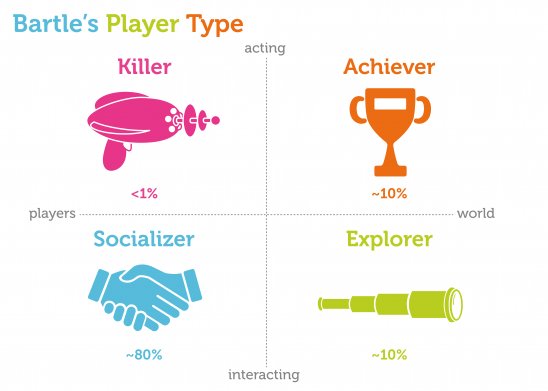
Keep in mind your students remain the same (so what you take in count for common classes should be considered likewise for your LMS), they need to communicate, tell things, show off, wear mobile devices, only fix their attention for a short time, want recognition, socialise, want practical, close to their lives exercises and ask for colourful and interactive means. Even more, they should be given the opportunity to reflect what they have inside their minds to better settle it down. Thus, take advantage of such profile. Flipping is just a framework where to apply many other strategies (gamification, project based learning, multiple intelligences, role playing, etc), but the participants are still the same.
Let me shed some light and make things practical through the following example:
A lesson about Natural Sciences: mass, volume, density, pressure and temperature are the concepts to work with. I want my students to read the definitions, see a couple of videos, manipulate a simulation and write the conclusions in teams. Maximum estimated time outside school: 30 mins.
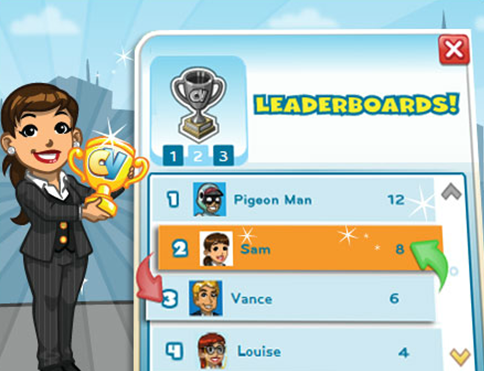
I set up two/three conditional activities in Moodle so they will be hiding and will appear consecutively. Videos are selected from YouTube and some simulations from PHET. Students will accomplish these tasks on their own or in teams. Final conclusions will be written in a shared Google doc in teams. Each student will make a quick test exam in Moodle. Having completed everything the team will be granted a badge and be put in a leaderboard (gamification’s PBL model).
Next day in the classroom we'll discuss about the concepts, experiments, conclusions and corrections. Each team will publish its own work in a blog or site and will score other teams' work in a Moodle workshop. That will be used as a final grade percentage, only earned if a minimum amount of badges have been collected during the term. As new lessons are analysed students will go on curating their own PLE. That will also be scored.
THE CONS
It’d be impossible not to find detractors and complains. Don’t avoid problems or give up. Improvise! Rearrange! Reschedule! Hybridize!
- Teachers
- It’s more work: yes, indeed... in the beginning, but once it's done you can reuse it over and over. Work in teams or involve the whole department to better distribute the workload. Look up other teachers’ works in the Internet. Plan smartly and make your work be accessible and easily reviewable.
- I need to know about new technologies: go step-by-step adding new elements to your flipped classes, don’t try to be a sage too prematurely.
- It’s a change in my working routine: start with a hybrid approach (and don't forget the fun). More time and effort is needed, but after everything is done you’ll have much more free time periods to be invested in other tasks.
- It’s difficult to find resources: start simple with some Youtube videos and look for interesting PLEs in websites like Symbaloo or Delicious.
- I can’t track my students: Moodle does it for you. Don’t forget to devise a contingency plan for lazy students.
- It’s not flexible: it is! You have total control over your resources and strategy.
- I don't trust third party systems: install your own LMS. For about 40€ a year you can have a domain and a Linux based space in a server. Moodle installation is way easy to do. For sure there’s a Computer Scientist in your school to help the team.
- Students
- I need to spend extra time: it’s true, that’s why you teacher should be careful about it. Micro lessons and hybrid approaches can be a good starting point.
- I feel helpless: give quality materials, make students help each other, provide with forums, chats and the like, value the effort they’ve made, not only the results.
- I don't have any laptop or PC: open up the computer room in your school.
- I get distracted (as it happens inside the classroom): make your lessons very social so the students will have to be communicating all the time. That’ll give them a chance to stay more focused as social collaboration is very natural.
- Parents
- I don’t want to get involved: it’s comprehensible. Don’t force it and let them know it’s something optional and that their children are perfectly assisted.
- I pay for the education of my children: wrap your flipped lessons as homework. Some parents could think you’re not doing your work as you should.
- I can’t help my children: many parents haven’t attended school or University, or they’ve just forgotten everything. Just let them know their participation is optional and that their children can go ahead on their own.
CONCLUSIONS
Flipped classes is a good framework to deliver your lessons, as long as its use is flexible and realistic. For the worst case scenarios hybrid approaches can do the trick. In any case it’s very important for your students and parents to be convinced that flipping is a good idea, otherwise voices contrary to it could ruin your plans. And don’t forget about polling and measuring to better know how things are developing. Good luck!